Friday, May 10, 2013

Freebie Friday #2 EXPIRED


This Freebie is now expired!


  It's Friday again! That means I have something free for you! This time it's 6 textured frames I made and swaped colors with. I cut a piece of paper with my "heartbeat" decorative scissors and scanned it into the computer. I used the pen tool to trace it and created a preset for a border, and a frame. This is the frame result. Enjoy!
  Each Frame is identical, other than color and they are huge! Feel free to share links to your creations in the comments below!

Remember, this file is only available for a limited time!!! You have until Monday 5/13/13 and then it's going into my vault!


Saturday, May 4, 2013

TUTORIAL - CREATING A WAVY RIBBON IN COREL PSP X4


I wanted to do a video tutorial, unfortunately I don't have the slightest clue how to do it. (If you know how I can do a screen capture video and easily encode it for free, comment below!) In this tutorial, I will show you how to make one of those cute wavy ribbons you always see in the scrapbook kits, and we are going to make it look realistic! It's something I discovered on my own, and hopefully it will help others add that little bit of pizazz to their layouts.


  1. Open a new Image.
    I make mine almost as wide as the papers I use.
  2. Select the Shape tool and pick a background color for your base color to your ribbon.
    These settings are important!
    Use whatever color you want. I'm sure you can even use gradients.
  3. Hold down SHIFT while you make a circle. Holding down the SHIFT key will create a perfect circle for you. 
  4. CTRL+C to copy the shape
  5. Press CTRL+G to paste a vector selection next to the original circle. Do this several times across your image and don't worry about lining them up!
    If you don't have enough circles to get across, just paste some more to avoid spacing.
  6. Press CTRL+A in your layer palette to select all the layer objects. 
  7. Press CTRL+D to remove the selection mask in your working space. 
  8. Select your Pick tool.
  9. Now line up objects vertically and distribute them evenly horizontally. It doesn't matter which one you do first, as long as you do them both.
  10. Right click your Layer Palette and select MERGE VISABLE.
  11.  Using the Selection tool, grab the bottom half of all the circles and offset them to the left or right the distance equal to 1/2 of a single circle. You can overlap the top and bottom portions too for a tighter ribbon.
  12. CTRL+D (This is the same as select none)
  13. Trim up the edges as you see fit.
  14.  CTRL+A (Select All) and select image.(It will create a floating selection so that just the object you are working on is selected)
  15.  Contract your selection to however thick you want your ribbon to be.
  16.  CTRL+SHIFT+I (Invert Selection), then press Delete (not backspace)
  17.  CTRL+SHIFT+I to invert selection again.
  18.  Add noise to give the ribbon a base texture. Make sure you are using Monochrome to maintain the color scheme.I usually use anywhere from 10-16%, depending on the sized ribbon I am making.
  19.  Now to add a secondary texture to your ribbon, to give it a fiber-like look, you will have to use the Texture effect > Texture.I use fine or coarse canvas. Depending on the colors you are using, you will have to tweak the height a bit to achieve the look you want. You don't want this to have a dramatic texture at all. Subtle is best.

     
  20.  Now we are going to use the Blinds texture effect to get those ribbon-like vertical lines.When using this, pick a color that is slightly darker than your base color. This will add dimension. Adjust your opacity until you get the look you want. Remember you want vertical lines, so leave horizontal unchecked.
  21.  Now you want to contract the selection a little. I usually do between 7-10 pixels to get that nice ridge at the top and bottom of the ribbon.
  22. Invert Selection (CTRL+SHIFT+I) Do not click the image to create a floating selection. It will rip the ridge layer up and leave a space with empty pixels. It isn't a huge problem but If you want a nice solid image, follow my lead.
  23.  You will now apply an inner bevel. Depending on the colors you are using, slight adjustments will need to be made, but the settings I'm using are pretty much right along the lines of what you want.
  24.  The top ridge of the ribbon now needs a little more dimension. To achieve this, use the drop shadow tool. You only need a slight shadow for a realistic look.
  25.  CTRL+D To select none. 
  26. Your ribbon is finished. You can add another drop shadow to the entire ribbon here, or save the ribbon(use a .png or other preferred transparency friendly format) for future use in a layout and add the drop shadow then.
This is what you should have if you followed the tutorial correctly. If you have any questions, feel free to leave them in the comments!


Share it Saturday!

So today I am going to share with you some of the work I have done over the course of the year. I do several different things and my plan is to showcase these designs to all of you! Enjoy!


Logo Design for Prolific Auto Detailing of Buffalo, NY


Vector Art of Tyler Szpara, A child injured in a serious car accident that I helped do a benefit for.


Painting done to match a child's bedroom theme.
A Rock star Themed Birthday party invitation I did.
Diaper Cake I did for my brother's girlfriend's shower.


That's it for this week! Come back next week for more shares. Remember, you can see all of my work by going to my Facebook page.

Friday, May 3, 2013

Freebie Friday #1 EXPIRED


 There's something else I have decided to try out.. Freebie Friday. Each week (hopefully I keep up with it!) I will be doing a freebie for my followers to collect. Every so often I will even do a referral freebie, where I give out freebies depending on how many shares a post gets, or how many likes my page gets. 

  Today I am going to share something from my First scrapbook kit, "Here Comes the Sun" It's a very special kit for me, being the first one, and I take a lot of pride in it for not completely sucking! So enjoy your freebie! FREEBIES ARE ONLY AVAILABLE FOR DOWNLOAD BETWEEN FRIDAY POST, AND THE MONDAY FOLLOWING. 


Freebie Friday Give Away #1 EXPIRED

Emily's Sweet Swirls- A 200+ Piece Digital Scrapbook Kit

For my second scrapbook kit, that I have spent 3 days on getting how I want, I created a very beautiful and dark kit. Named after my daughter, Emily, whose favorite color is purple, this kit features over 200 pieces of butterfly themed elements. There are alphas, papers, strings, embellishments, frames, ribbons and so much more! I am looking for the correct avenue in selling this kit and I'm putting together a mini sampler kit (smaller images and less objects) for scrapbooker enthusiasts to try out. The kit will be $10 per download (full commercial use!). Let me know what you think of it!


I started making digital scrapbook kits!


  I've been using this site, Pixelscrapper.com and some of the kits on the site for making personal scrapbook layouts. I figured, I have been doing digital design for how long now, why couldn't I start making my own elements and kits? Well, by just messing around with some textures and shapes in Corel's Paint Shop Pro X4, I've decided it is something I am capable of doing and I ended up making the following kit. My very first kit.. and it doesn't suck! I noticed after putting it together, I have a few issues with sizing and proportioning objects but it's something I can work on. 


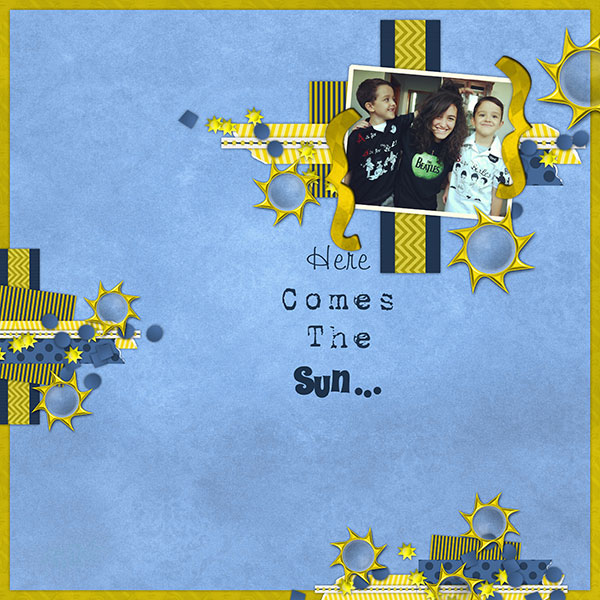
"Here Comes the Sun" Digital Scrap book Kit by Renee Biggie
I posted a download link for the layout on Pixel Scrapper and user, Cintia Dhariana made a layout with it.
Layout by Cintia Dhariana using my Scrapbook kit, "Here Comes the Sun"
She even improvised with creating her own brackets. I love it!

If you would like to download this kit, leave a comment!

Nazy's Design now has a blog!


Nazy's Design now has a blog! I figured this is the best way to keep track of everything I am doing. Anytime I have something new to post or something I'd like to share, I will be posting it here (as well as on Facebook!) So keep a look out for anything new! I plan on making many changes this month to the site.